Audi A6 Typ 4G: Driver Door Control Module -J386- and Front Passenger Door Control Module -J387-, Removing and Installing
Removing
- Remove the door trim panel. Refer to → Body Interior; Rep. Gr.70; Front Door Trim Panels; Front Door Trim Panel, Removing and Installing.
- Open the release and the disconnect the connectors -1- and -2-.
- Disconnect the connector -3-.
- Disconnect the connector -4- on the door control module.
- Press the retaining detent -5- in direction of -arrow- and disengage the door control module -6- on the door shell.
Installing
- Installation in reverse order of removal making sure the retainer locks into the inner door panel.

Left Rear Door Control Module -J388- and Right Rear Door Control Module -J389-, Removing and Installing
Removing
- Push the release downward and disconnect the connectors.
- Press the catch in direction of -arrow- and disengage the door control module -1- from the door shell.
Installing
- Installation in reverse order of removal making sure the retainer locks into the inner door panel.

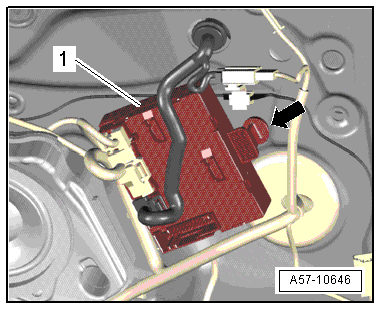
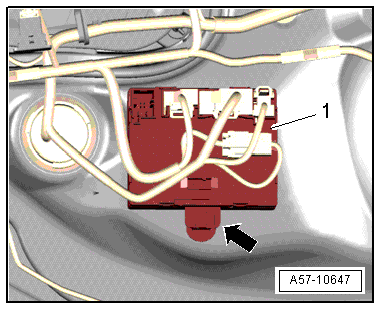
Comfort System Central Control Module -J393-, Removing and Installing
Comfort System Central Control Module -J393-, Removing and Installing, Sedan
- If the control module is being replaced, select the "Replacing" function in the "Guided Fault Finding" mode or "Guided Functions" of the respective control module using the Vehicle Diagnostic Tester.
Removing
- Remove the right luggage compartment side trim panel. Refer to → Body Interior; Rep. Gr.70; Luggage Compartment Trim Panels; Luggage Compartment Side Trim Panel, Removing and Installing.
- Open the cable tie -4- and push the wiring harness slightly to the side.
- Remove the nuts -2 and 3- and remove the frame -1- with the central control module from the retaining pin -arrow-.

- Turn the frame with central control module.
- Cut through the cable ties -4-.
- Release the tabs -3--A arrows- and remove the Comfort System Central Control Module -J393--item 2- from the frame -1--arrow B-.

- Disconnect the connectors -1 and 3-.
- Pull the fuse -6- carefully and disconnect the antenna connector -7-.
- Disconnect the connectors -2, 4 and 5-.

- To disconnect the connector, press the retainer -1-, turn the bracket in direction of -arrow- and disconnect the connector.
Installing
Install in reverse order of removal. Note the following:
- Install the frame. Refer to → Electrical Equipment; Rep. Gr.97; Relay Carriers, Fuse Panels and E-Boxes; Overview - Relay Carriers, Fuse Panels and E-Boxes.

Comfort System Central Control Module -J393-, Removing and Installing, Avant
- If the control module is being replaced, select the "Replacing" function in the "Guided Fault Finding" mode or "Guided Functions" of the respective control module using the Vehicle Diagnostic Tester.
Removing
- Remove the right luggage compartment side trim panel. Refer to → Body Interior; Rep. Gr.70; Luggage Compartment Trim Panels; Luggage Compartment Side Trim Panel, Removing and Installing.
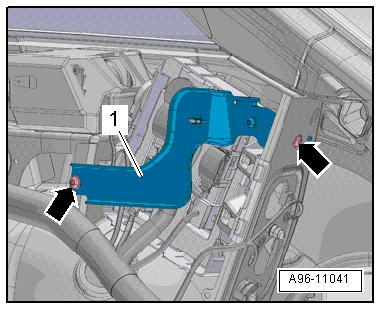
- Remove the bolts -arrows-.
- Remove the bracket for the backrest release lever -1-.

- Release the tabs -3--A arrows- and remove the Comfort System Central Control Module -J393--item 2- from the frame -1--arrow B-.

- Disconnect the connectors -1 and 3-.
- Pull the fuse -6- carefully and disconnect the antenna connector -7-.
- Disconnect the connectors -2, 4 and 5-.

- To disconnect the connector, press the retainer -1-, turn the bracket in direction of -arrow- and disconnect the connector.
Installing
Install in reverse order of removal. Note the following:
- Install the bracket for the backrest release lever. Refer to → Body Interior; Rep. Gr.72; Rear Seats; Overview - Locking Mechanism.

Comfort System Central Control Module -J393- Frame, Removing and Installing, Avant
Removing
- Remove the Comfort System Central Control Module. Refer to → Chapter "Comfort System Central Control Module -J393-, Removing and Installing, Avant".
- Release the securing tab -3--arrow A- and tilt the frame -2- slightly forward -arrow B- and guide it out of the body -1-.
Installing
Install in reverse order of removal.


