Audi A6 Typ 4G: Flange Shaft Seals, Replacing, Rear Final Drive Removed
- The shaft seal can be only be replaced with the final drive removed.
Special tools and workshop equipment required
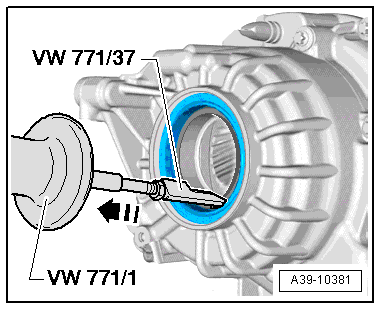
- Slide Hammer Set -VW771-
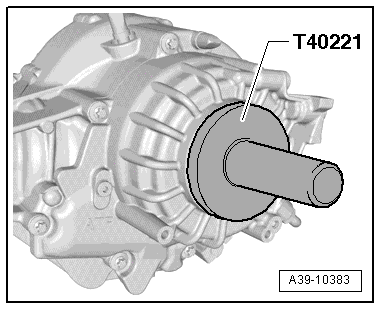
- Seal Installer - Drift Shaft -T40221-
- ATF
Removing
- Follow all general repair information. Refer to → Chapter "General Repair Information".
- Remove the rear final drive. Refer to → Chapter "Rear Final Drive, Removing and Installing, Audi A4, A5 Coupé/Sportback/Cabriolet, A6, A7".
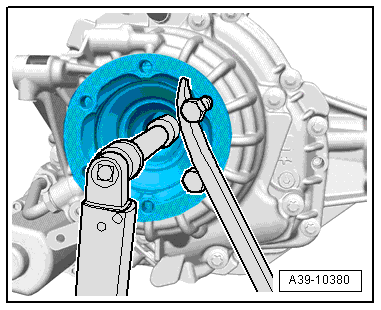
- Remove the flange shaft bolt. To do this, install two bolts into the flange and counterhold the flange shaft using an assembly lever.
- Remove the flange shaft.
 Note
Note
If it not possible to remove the flange shaft by hand, then use the Slide Hammer Set -VW771- to remove it.
- Remove flange shaft seal with the Slide Hammer Set -VW771- and Slide Hammer Set - Hook -VW771/37-.
Installing
Install in reverse order of removal. Pay attention to the following:
Install Right Shaft Seal
- Coat the outer circumference and the sealing lips on the shaft seal with ATF.
- Install the shaft seal all the way. Be careful not to bend it.
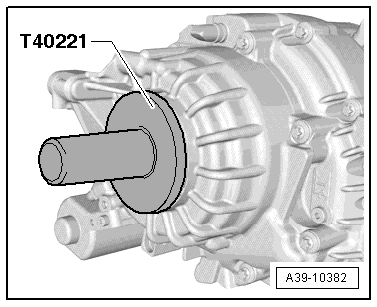
Installing Left Shaft Seal
- Coat the outer circumference and the sealing lips on the shaft seal with ATF.
- Install the shaft seal all the way. Be careful not to bend it.
- Install the flange shaft.
Note
If it is not possible to install the flange shaft all the way in by hand, then use a plastic mallet.
- Tighten the new flange shaft bolt to the tightening specification -item 1-.
- Install the rear final drive. Refer to → Chapter "Rear Final Drive, Removing and Installing, Audi A4, A5 Coupé/Sportback/Cabriolet, A6, A7".
- Check the ATF level in the rear final drive. Refer to → Chapter "ATF Level in Rear Final Drive 0BF and 0BE, Checking".
Flange Shaft Protective Ring, Replacing
Special tools and workshop equipment required
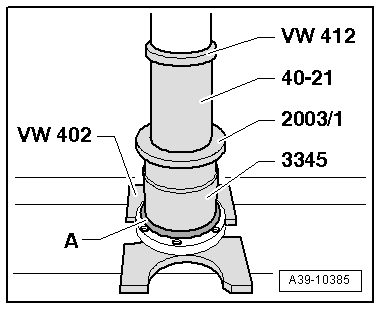
- Press Plate -VW401-
- Press Plate -VW402-
- Press Piece - Multiple Use -VW412-
- Bearing Installer - Differential Bearing -40-21-
- Seal Installer - Flywheel Oil Seal Kit - Press Sleeve -2003/1- from the Seal Installer - Flywheel Oil Seal Kit -2003-
- Bearing Installer - Wheel Bearing -3345-
- Separating Tool - 22-115mm, such as Puller - Kukko Quick Action Separating Tool - 22-115mm -17/2-
Removing the Protective Ring -A- from the Flange Shaft
B - Separating Tool - 22-115mm, such as Puller - Kukko Quick Action Separating Tool - 22-115mm -17/2-
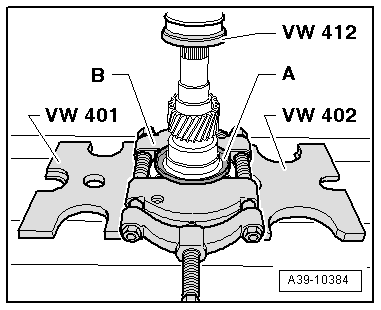
Carefully Press the Ring -A- onto the Flange Shaft.
- Protective ring installation location -A-: The larger outer diameter on the protective ring faces the Bearing Installer - Wheel Bearing -3345-.