Audi A6 Typ 4G: Front Interior Lamp/Reading Lamp, Removing and Installing
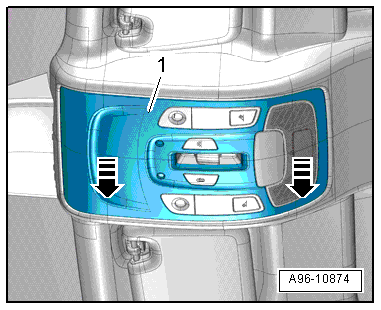
Front Interior Lamp/Reading Lamp, Removing and Installing, without Eyeglass Compartment
Removing
- Remove the interior lamp cover -1- in direction of -arrows-.
- Remove the bolt -1-.
- Move the interior/reading lamp -2- forward and down in direction of -arrow- and disengage it.
- Disconnect the connectors.
Installing
Install in reverse order of removal. Note the following:
- Mount the interior lamp and screw in.
- Press the interior lamp cover until it clicks into place.

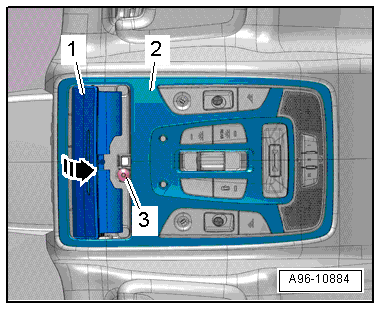
Front Interior Lamp/Reading Lamp, Removing and Installing, with Eyeglass Compartment
Removing
- Open the eyeglass compartment -1-.
- Remove the bolt -3-.
- Move the interior/reading lamp -2- forward and down in direction of -arrow- and disengage it.
- Disconnect the connectors.
Installing
Install in reverse order of removal.
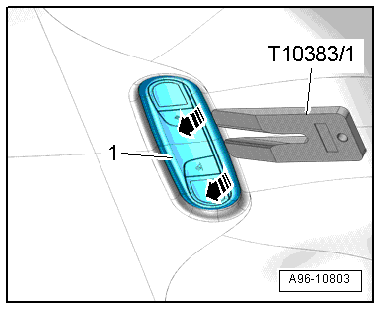
Rear Interior/Reading Lamp, Removing and Installing
Special tools and workshop equipment required
- Wedge Set -T10383-
Removing
- Remove the interior lamp/reading lamp -1- from the roof using Wedge Set - Wedge 1 -T10383/1- in direction of -arrows-.
- Disconnect the connector.
Installing
Install in reverse order of removal. Note the following:
- Insert the interior/reading lamp into the roof cutout and clip it in.
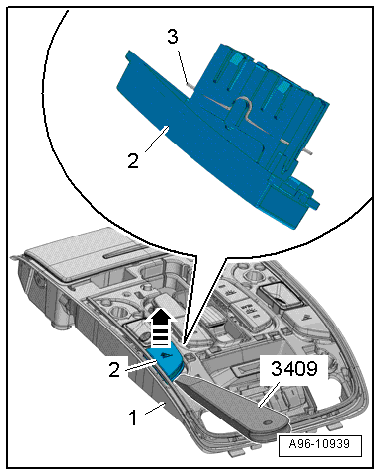
Left/Right Front Reading Lamp Button -E633-/-E634-, Removing and Installing
Special tools and workshop equipment required
- Trim Removal Wedge -3409-
Removing
- Remove the interior/front reading lamp with the eyeglass compartment. Refer to → Chapter "Front Interior Lamp/Reading Lamp, Removing and Installing, with Eyeglass Compartment".
- Remove the cover -1- from the interior lamp in direction of -arrows-.
- If equipped, remove the rubber piece -2- and open the tabs.

- Remove the interior lamp/reading lamp -1- button -2- in direction of -arrow- using Trim Removal Wedge -3409-.
Installing
Install in reverse order of removal. Note the following:
- Press the new button into the interior/reading lamp.
- Make sure the springs -3- on the left and right sides of the button fit correctly in the mounts.
- Press the interior lamp cover until it clicks into place.
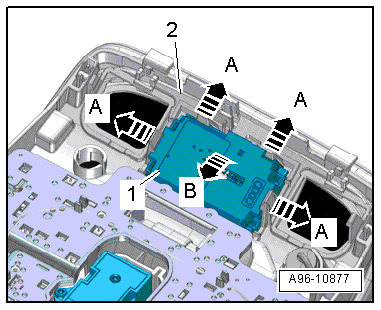
Garage Door Opener Control Head -E284-, Removing and Installing
Removing
- Remove the front interior/reading lamp. Refer to → Chapter "Front Interior Lamp/Reading Lamp, Removing and Installing".
- Remove the Anti-Theft Alarm System Sensor -G578-, if equipped. Refer to → Chapter "Anti-Theft Alarm System Sensor -G578-, Removing and Installing".
- Carefully push the tabs to the side in direction of -arrows A-.
- Remove the controls -1- from the front interior/reading lamp -2- in direction of -arrow B-.
Installing
Install in reverse order of removal.