Audi A6 Typ 4G: Trim Molding, Removing and Installing
Roof Trim Molding, Removing and Installing
Special tools and workshop equipment required
- Trim Removal Wedge -3409-
Removing
 Note
Note
- Do not bend the roof trim molding.
- Tape around the roof trim molding on the A-pillar to prevent damaging the paint.
- Open the front and rear doors.
- Remove the roof trim molding -1- from the clips -arrow- starting at the A-pillar using the Trim Removal Wedge -3409-.

- Remove the roof trim molding from the clips -1- in the area around the rear side window -2-.
- Have a second technician hold the roof trim molding to keep it from damaging the paint.

- Tape off the area around the side window trim molding -1- with adhesive tape, as illustrated, -3- to protect the paint.
- Pull the roof trim molding -2- out of the clips -1- in the side window in direction of -arrow-.
- Remove the roof trim molding.

Installing
- Install the roof trim molding -1- into the side window trim molding -7-.
- The clamp -5- must fit correctly into the guide -6-.
- The roof trim molding be touching the end of the side window trim molding.
- Align the roof trim molding by both centering pins -2- with the holes -3- inside the roof.
- Press the roof trim molding into the clamps near the side window and then press on the clips -4- until they click into place.

Side Window Trim Molding, Removing and Installing
Special tools and workshop equipment required
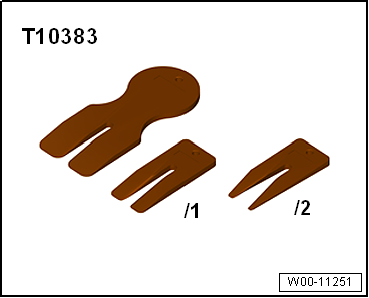
- Wedge Set -T10383-
Removing
Note
Do not twist or bend the side window trim molding.
- Removing the roof trim molding. Refer to → Chapter "Roof Trim Molding, Removing and Installing".
- Tape off the area around the side window trim molding -2- with adhesive tape -1- as shown to protect the paint.
- Press off the side window decorate trim using the wedge -T10383/1- from the clips.
- Remove the side window trim molding.

Installing
Install in reverse order of removal. Note the following:
- Coat the rubber strips and the side window trim molding with tire mounting paste.
 Caution
Danger of causing damage to the rubber strip.
- If the rubber strip is not behind the trim molding, then it will get damage the next time the trim molding is removed.
- It will be necessary to replace the damaged rubber strip. Replace the side window.
- Mount the side window trim molding -1- to the body at the C-pillar at the corner -arrow- of the rubber strip as illustrated.
- The rubber strip -2- must be above the trim molding.
- The clips -4- must be parallel to the side window trim molding.
- Press the side window trim molding onto the clips until it clicks into place.
- The rubber strip must cover the side window trim molding.
- The rubber strip -3- must be installed into the curve in the side window trim molding using Wedge -T10383/1-.

Side Window Trim Molding, Removing and Installing, Vehicles from MY 2015
Special tools and workshop equipment required
- Removal Wedge -T40233-

Removing
- Open the door.
- Pry out the trim strip -1- using the Removal Wedge -T40233-starting from the bottom out of the window guide -2--arrow-, as shown.
- Carefully pry the entire length of the trim molding out of the window guide and remove it.

Installing
Install in reverse order of removal. Note the following:
- Align the trim strip -1- on the C-pillar door flange, and place in the guide nut -3- of the window guide -2- from below and push on the entire length.

Front Door Trim Molding, Removing and Installing, Vehicles from MY 2015
Special tools and workshop equipment required
- Removal Wedge -T40233-
Removing
- Pry out the trim strip -1- using the Removal Wedge -T40233-starting from the bottom out of the window guide -2--arrow-, as shown.
- Carefully pry the entire length of the trim molding out of the window guide and remove it.

Installing
Install in reverse order of removal. Note the following:
- Align the trim strip -1- on the B-pillar door flange, and place in the guide nut -3- of the window guide -2- from below and push on the entire length.

Rear Door Upper Trim Molding, Removing and Installing, Vehicles from MY 2015
Special tools and workshop equipment required
- Removal Wedge -T40233-
Removing
- Remove the rear door trim molding. Refer to → Chapter "Rear Door Trim Molding, Removing and Installing, Vehicles from MY 2015".
- Pry out the trim strip -1- using the Removal Wedge -T40233-starting from the bottom out of the window guide -2--arrow-, as shown.
- Carefully pry out the entire length of the trim molding from the window guide. Remove the spring clip -4- from the window guide guiding nut -3- while doing this.
- Remove the trim molding.

Installing
Install in reverse order of removal. Note the following:
- Slide the spring clip -4- into the guide nut -5-.
- Insert the trim molding -1- from the bottom into the guide nut -3- of the window guide -2- and press on the entire length.

Rear Door Trim Molding, Removing and Installing, Vehicles from MY 2015
Special tools and workshop equipment required
- Removal Wedge -T40233-
Removing
- Pry out the trim strip -1- using the Removal Wedge -T40233-starting from the bottom out of the window guide -2--arrow-, as shown.
- Carefully pry the entire length of the trim molding out of the window guide and remove it.

Installing
Install in reverse order of removal. Note the following:
- Align the trim strip -1- on the upper trim molding. Insert the guide nut -4- from the window guide -3- into the spring clip -2-, and press on the entire length.


