Audi A6 Typ 4G (2011–2018) Workshop Manual / Chassis / Brake System / Hydraulic Components / Overview - Front Brake Caliper
Audi A6 Typ 4G: Overview - Front Brake Caliper
Overview - Front Brakes, 1LA/1LJ
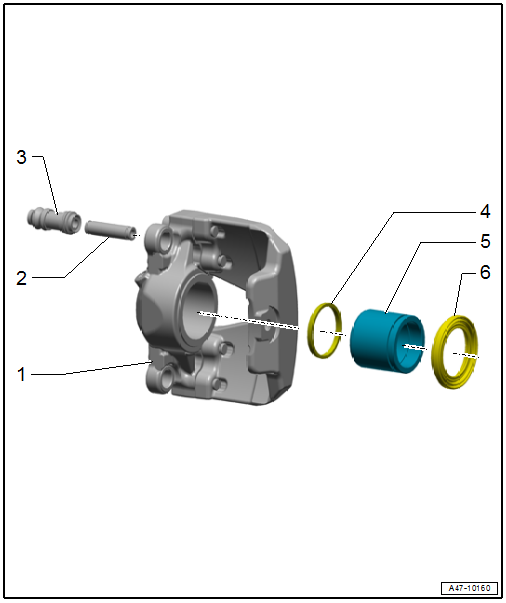
1 - Brake Caliper
2 - Guide Pin
- Quantity: 2
- Replacing. Refer to → Chapter "Bearing Bushing and Guide Pin, Replacing, Steel Brakes 1LA/1LJ".
3 - Bearing Bushing
- Quantity: 2
- Replacing. Refer to → Chapter "Bearing Bushing and Guide Pin, Replacing, Steel Brakes 1LA/1LJ".
4 - Seal
5 - Brake Caliper Piston
- Removing and installing. Refer to → Chapter "Brake Caliper Piston, Removing and Installing, 1LA/1LJ"
- Coat with a thin layer of lithium grease. Refer to Parts Catalog.
6 - Protective Cap
- When damaged, install the complete repair kit. Refer to the Parts Catalog.
Overview - Front Brake Caliper, 1LF/1LL
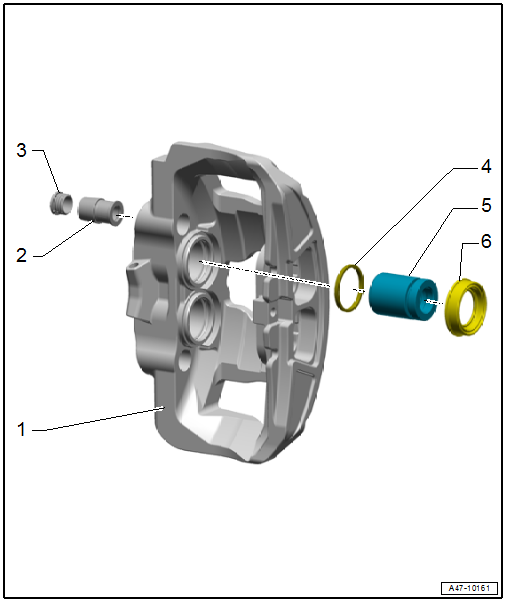
1 - Brake Caliper
2 - Bearing Bushing
- Quantity: 2
- Replace if damaged. Refer to → Chapter "Bearing Bushing and Guide Pin, Replacing, Steel Brakes 1LF/1LL"
3 - Protective Cap
- Quantity: 2
- Push on the bearing bushing
4 - Seal
- Quantity: 2
- Coat with a thin layer of lithium grease. Refer to Parts Catalog.
5 - Brake Caliper Piston
- Quantity: 2
- Removing and installing. Refer to → Chapter "Brake Caliper Piston, Removing and Installing, 1LF/1LL".
- Coat with a thin layer of lithium grease. Refer to Parts Catalog.
6 - Protective Cap
- Quantity: 2
- When damaged, install the complete repair kit. Refer to the Parts Catalog.
- Coat with a thin layer of lithium grease. Refer to Parts Catalog.
Overview - Front Brake Caliper, 1LU/1LM/1LX/1LW/1LN
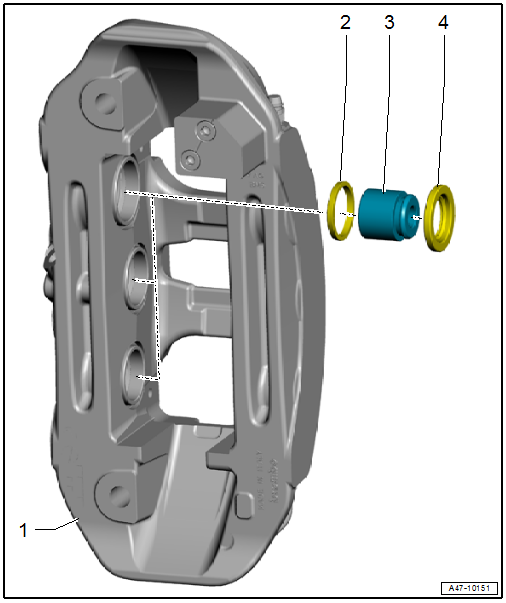
1 - Brake Caliper
2 - Seal
- Quantity: 6
- Coat with a thin layer of lithium grease. Refer to Parts Catalog.
3 - Brake Caliper Piston
- Quantity: 6
- Removing and installing. Refer to → Chapter "Brake Caliper Piston, Removing and Installing, 1LU/1LM/1LX/1LN/1LW".
- Coat with a thin layer of lithium grease. Refer to Parts Catalog.
4 - Protective Cap
- Quantity: 6
- When damaged, install the complete repair kit. Refer to the Parts Catalog.
- Coat with a thin layer of lithium grease. Refer to Parts Catalog.
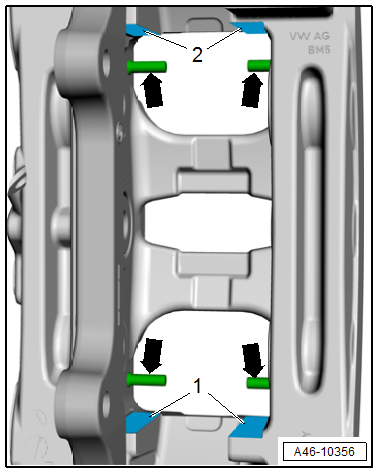
 Caution
The guide pin for the brake pads may only be loosened on brake calipers for the ceramic brakes "PR-1LW".
Tightening specification for the guide pins -arrows-"1LW brake" 24 Nm.