Audi A6 Typ 4G: Underbody Panels, Removing and Installing
Front Vehicle Underbody Cover, Removing and Installing
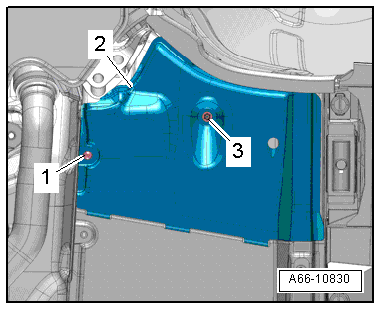
Removing
- Remove the nut -3- and expanding clip -1-.
- Remove the front cover -2- forward.
- Remove the front cover.
Installing
Install in reverse order of removal.
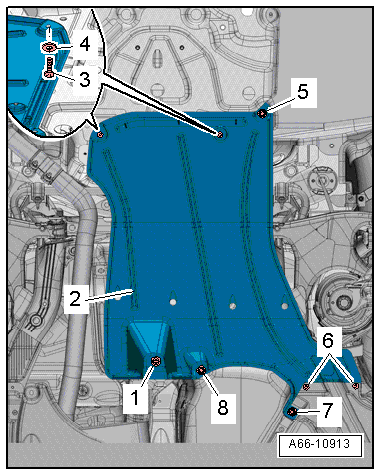
Center Vehicle Underbody Cover, Removing and Installing
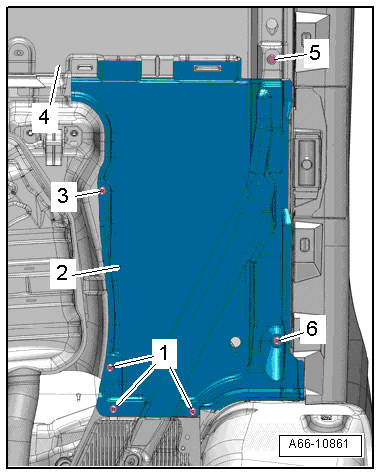
Removing
- Removing the front cover for the underbody. Refer to → Chapter "Front Vehicle Underbody Cover, Removing and Installing".
- Remove the expanding clips -4 and 8- and the nuts -1, 2, 5, 6 and 7-.
- Remove the center cover -3- forward.
- Remove the center cover.
Installing
Install in reverse order of removal.

Rear Vehicle Underbody Cover, Removing and Installing
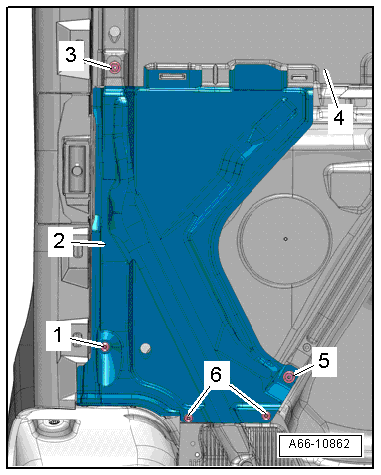
Removing
Left Side of the Vehicle:
- Remove the bolts -1, 3 and 6-.
- Remove the nut -5- from the center cover -4-.
- Remove the rear cover -2- to the rear.
- Remove the rear cover.
Right Side of Vehicle:
- Remove the nut -5- and bolts -1 and 6-.
- Remove the nut -3- from the center cover -4-.
- Remove the rear cover -2- to the rear.
- Remove the rear cover.
Installing
Install in reverse order of removal.
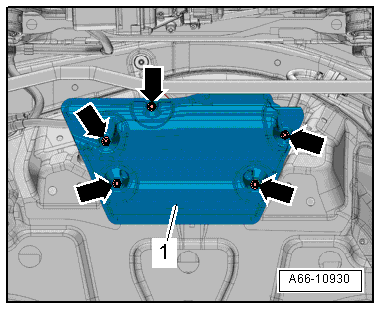
Left Rear Vehicle Underbody Cover, Removing and Installing
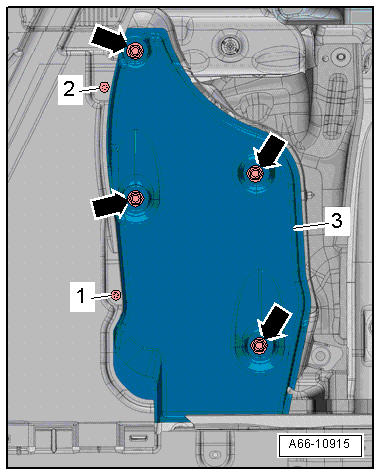
Removing
- Remove the bolts -1 and 2- and nuts -arrows-.
- Remove the rear cover -3-.
Installing
Install in reverse order of removal.
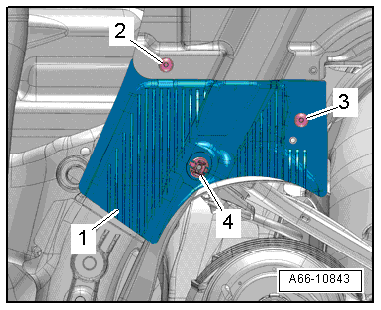
Stone Chip Protective Molding, Removing and Installing
Removing
- Remove the screws -2 and 3- and the clip -4-.
- Remove the stone chip protective molding -1-.
- To remove the clips -3-, unlock the release lever -2- with narrow pliers -arrow A- and push it off the pin -1--arrow B-.
Installing
Install in reverse order of removal.

Front Cover for Spare Tire Well, Removing and Installing
Removing
- Remove the nuts -arrows-.
- Remove the front cover -1- from the spare wheel well.
Installing
Install in reverse order of removal.
Center Cover, Removing and Installing
Removing
- Loosen the expanding clip -1-.
- Remove the nuts -5, 7 and 8- and screws -6-.
- Remove the bolts -3-. Pay attention to the washers -4-.
- Remove the center cover -2-.
Installing
Install in reverse order of removal.
Right Rear Cover, Removing and Installing
Removing
- Loosen the expanding clip -6-.
- Remove the nuts -3, 4 and 7- and screw -2-.
- Push the center cover -1- slightly downward and remove the right rear cover -5-.
Installing
Install in reverse order of removal.

Tunnel Bridge, Removing and Installing
Removing
- Remove the expanding clip -8- from the left front cover -3-.
- Remove the nuts -1 and 2-.
 Note
Note
Ignore -items 4 to 7-.
- Remove the bolts -1, 3, 4 and 5-.
- Remove the crossbrace -2-.
Installing
Install in reverse order of removal. Note the following:
- Install the center cover for the underbody. Refer to → Chapter "Center Vehicle Underbody Cover, Removing and Installing".


