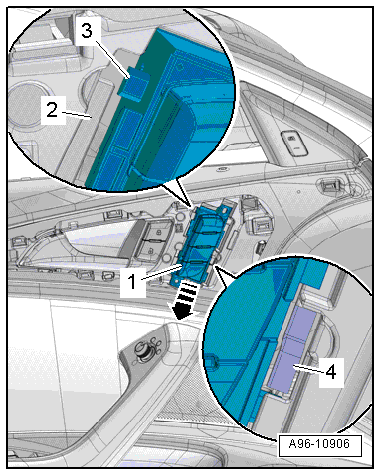
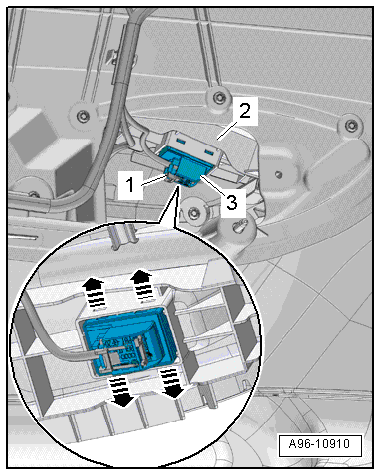
Audi A6 Typ 4G: Valet Parking Lock Button -E536-, Removing and Installing
Removing
- Remove the glove compartment. Refer to → Body Interior; Rep. Gr.68; Storage Compartments and Covers; Glove Compartment, Removing and Installing.
- Open the retainers in direction of -arrows- and remove the valet parking lock button -2- forward.
- Disconnect the connector -1-.
Installing
Install in reverse order of removal.
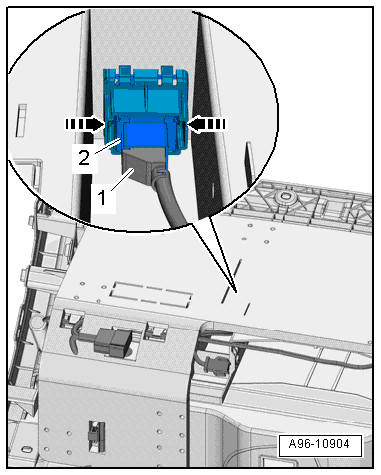
Glove Compartment Lamp Switch -E26-, Removing and Installing
Removing
- Remove the glove compartment. Refer to → Body Interior; Rep. Gr.68; Storage Compartments and Covers; Glove Compartment, Removing and Installing.
- Disconnect the connector -1-.
- Remove the hinge bolts -3-.
- Turn the switch -2- counter-clockwise -arrow- and remove it.
Installing
Install in reverse order of removal.

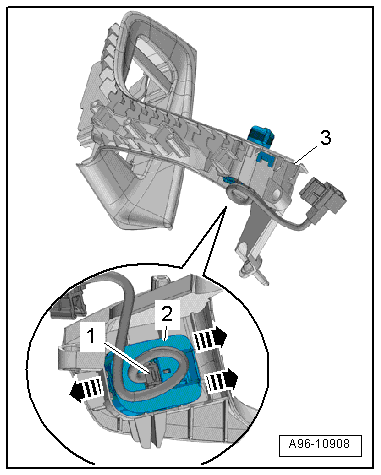
Mirror Adjusting Switch -E43-/Folding Mirror Adjustment Switch -E168-, Removing and Installing
Removing
- Remove the power window control head in the driver door. Refer to → Chapter "Power Window Control Head In Driver Door -E512-, Removing and Installing".
- Remove the pull handle/front armrest. Refer to → Body Interior; Rep. Gr.70; Front Door Trim Panels; Overview - Front Door Trim Panel.
- Carefully release the hooks -arrows- with a small screwdriver.
- Remove the mirror adjusting switch -1- from the switch mount -3-.
- Disconnect the connector -2-.
Installing
Install in reverse order of removal. Note the following:
 Note
Note
When installing, ensure symbol panel is inserted in front of mirror adjusting switch.
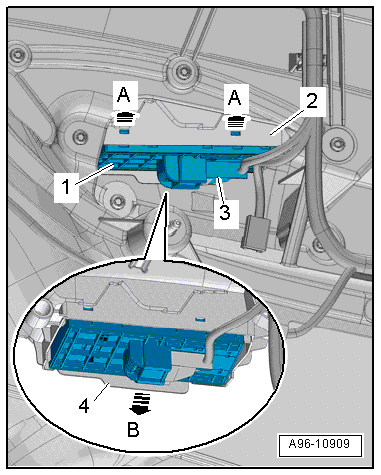
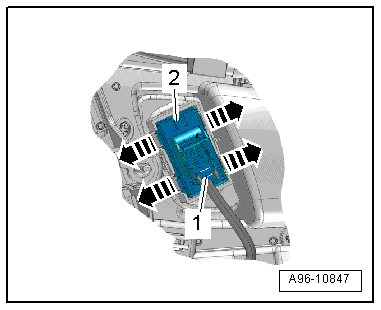
Power Window Control Head In Driver Door -E512-, Removing and Installing
Removing
- Remove the front door trim panel and move the noise insulation to the side. Refer to → Body Interior; Rep. Gr.70; Front Door Trim Panels; Front Door Trim Panel, Removing and Installing.
- Carefully release the hooks in direction of -arrows A- with a small screwdriver.
- Release the unlock button -4- in direction of -arrow B-.
- Press the power window switch -1- out of the switch mount -2-.
- Disconnect the connector -3-.
Installing
Install in reverse order of removal.
Front Passenger Door Window Regulator Switch -E107-, Removing and Installing
Removing
- Remove the front door trim panel and move the noise insulation to the side. Refer to → Body Interior; Rep. Gr.70; Front Door Trim Panels; Front Door Trim Panel, Removing and Installing.
- Disconnect the connector -1-.
- Carefully release the hooks in direction of -arrows- with a small screwdriver.
- Press the power window switch -3- out of the switch mount -2-.
Installing
Install in reverse order of removal.
Driver/Front Passenger Interior Locking Switch -E150-/-E198-, Removing and Installing
Removing
- Remove the front door trim panel. Refer to → Body Interior; Rep. Gr.70; Front Door Trim Panels; Front Door Trim Panel, Removing and Installing.
- Disconnect the connector -1-.
- Open the clips -arrows- and remove the interior locking switch -2- outward.
Installing
Install in reverse order of removal.
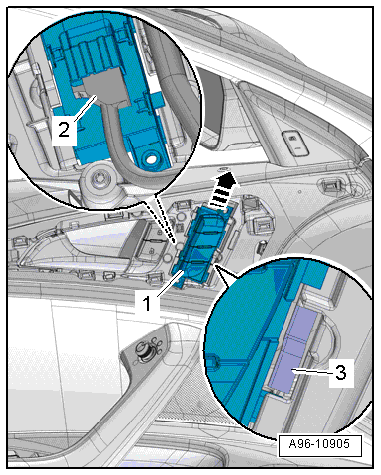
Driver/Front Passenger Memory Seat Control Head -E97-/-E277-, Removing and Installing
Removing
- Remove the interior door mechanism trim. Refer to → Body Interior; Rep. Gr.70; Front Door Trim Panels; Overview - Front Door Trim Panel.
- Push the tab -3- slightly to the rear and remove the control head -1- from the mount at the same time in direction of -arrow-.
- Disconnect the connector -2-.
- Remove the control head.
Installing
Install in reverse order of removal. Note the following:
- Connect the connectors.
- Place the control head -1- on the mount -2- and push on it until the tab -4- clicks into place in direction of -arrow-.
- The guide -3- must slide downward behind the mount.