Audi A6 Typ 4G: Generator
Overview - Generator
Overview - Generator, Version 1 without Bushing
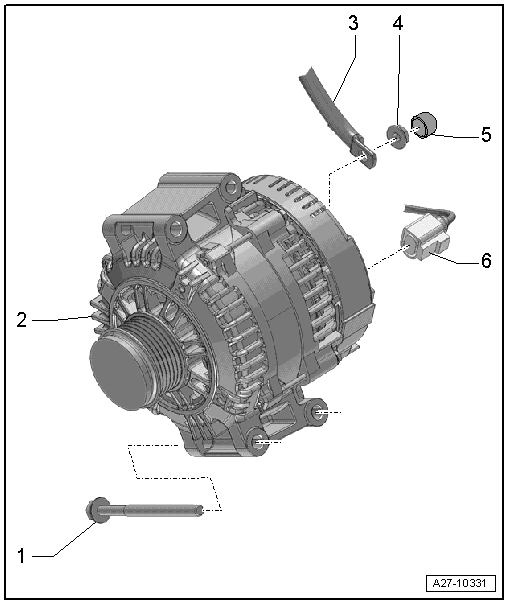
1 - Screw
- Steel bolt 20 Nm
- Aluminum bolt 8 Nm +180º
- Replace after removal
- There are different versions. Refer to the Parts Catalog.
- Quantity: 4
2 - Generator
- Removing and installing. Refer to → Chapter "Generator, Removing and Installing".
3 - Terminal 30/B+
4 - Nut
- 16 Nm
5 - Cap
6 - Connector
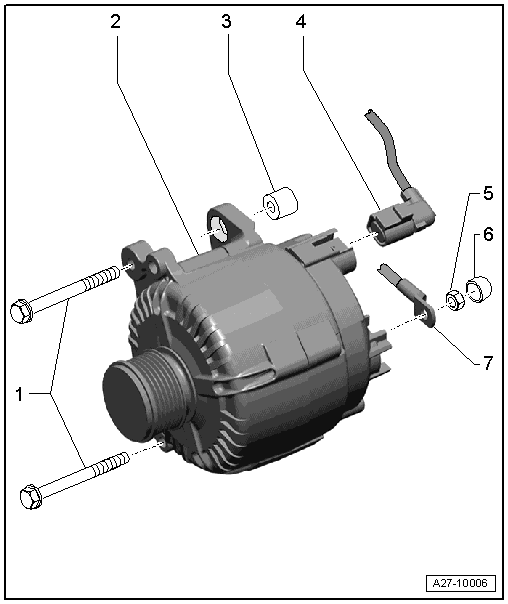
Overview - Generator, Version 2 without Bushing

1 - Screw
- 20 Nm
- Quantity: 2
2 - Generator
- Removing and installing. Refer to → Chapter "Generator, Removing and Installing".
3 - Threaded Pin
- 10 Nm
- Quantity: 2
4 - Nut
- 20 Nm
- Quantity: 2
5 - Terminal 30/B+
6 - Nut
- 16 Nm
7 - Cap
8 - Connector
Overview - Generator with Bushings
1 - Bolts
- 23 Nm
2 - Generator
- Removing and installing. Refer to → Chapter "Generator, Removing and Installing".
3 - Bushing
- Because the clamping force of a tight bushing is too low despite the correct torque, loosen the bushings
4 - Connector
5 - Nut
- 16 Nm
6 - Cap
7 - Terminal 30/B+
Overview - Generator, Water-Cooled Generator with Bushings
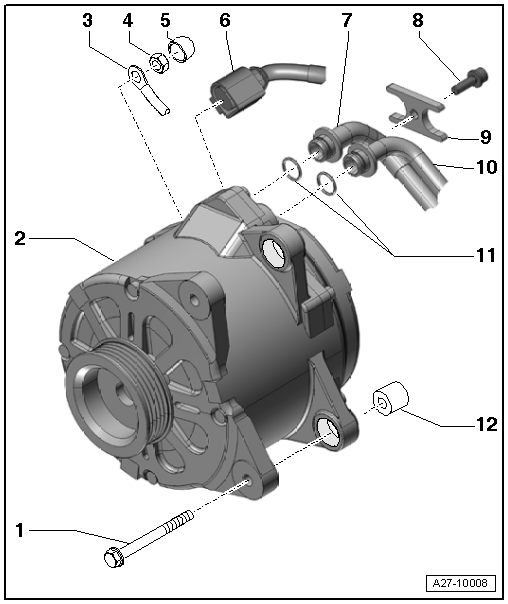
1 - Screw
- 23 Nm
2 - Generator
- Removing and installing. Refer to → Chapter "Generator, Removing and Installing".
3 - Terminal 30/B+
4 - Nut
- 16 Nm
5 - Cap
- Depending on the vehicle equipment level
6 - Connector
7 - Coolant Return Pipe
8 - Screw
- 9 Nm
9 - Retaining Plate
- For the coolant pipes
10 - Coolant Supply Pipe
11 - O-Rings
- Replacing
12 - Bushing
- Because the clamping force of a tight bushing is too low despite the correct torque, loosen the bushings

