Audi A6 Typ 4G (2011–2018) Workshop Manual / Body / Body Exterior / Hood, Lids / Hood Latch, Removing and Installing
Audi A6 Typ 4G: Hood Latch, Removing and Installing
Removing
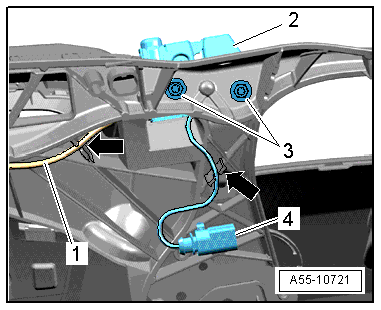
- Disconnect the connector -4- from the anti-theft alarm system.
- Disconnect the connector from the lock carrier.
- Free up the release cable -1- by removing the clamps.
- Remove bolts -3-.
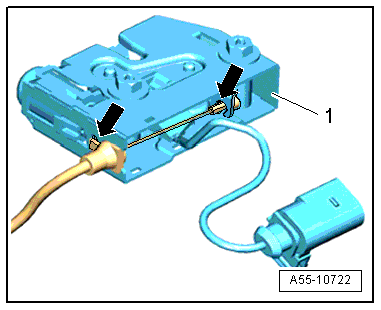
- Disconnect the hook from the cable -left arrow- and remove it with the guide downward from the hood latch -1-.
- Disconnect the release cable from the release lever -right arrow-.
Installing
Install in reverse order of removal.
Hood Release Lever, Removing and Installing
Release Lever Cover, Removing and Installing
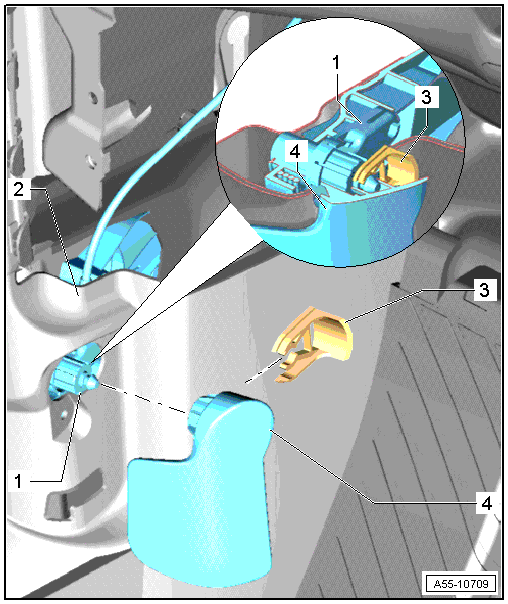
1 - Release Lever
2 - A-Pillar Lower Trim
3 - Clamp
- Press in completely, it must engage.
4 - Hood Release Lever Cover
- First disengage the cable from the coupling inside the engine compartment.
- Pry the clip out of the hood release lever.
- Remove the cover sideways from the operating lever.
Release Lever, Removing and Installing
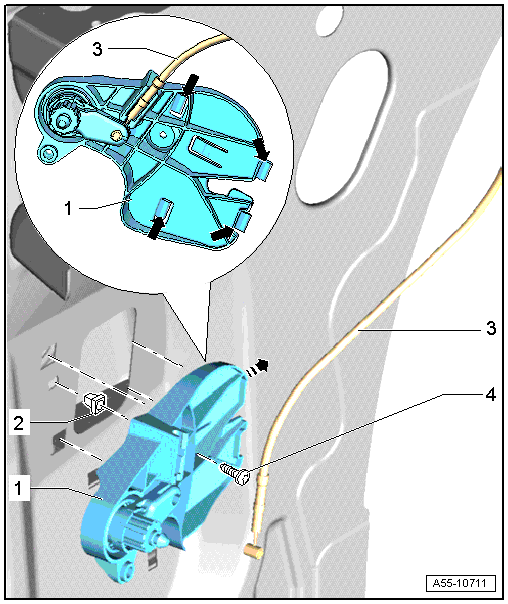
1 - Hood Release Lever Bracket
- The hood release lever cover is removed.
- The trim for the "lower A-pillar is removed".
- Remove the screws -3- and disengage the cable -1-.
2 - Clip
3 - Release Cable
- Clip the cable bracket into the mounting bracket as shown in the magnified section of the illustration.
4 - Screws
- 2 Nm

