Audi A6 Typ 4G: Catch, Removing and Installing
Hood Hook, Removing and Installing
Removing
- Remove the nuts -1- and the
hood catch -2-.
Installing
Install in reverse order of removal.
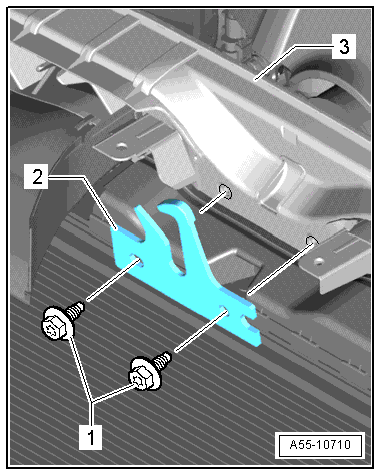
Lock Carrier Hook, Removing and Installing
Removing
- Remove the lock carrier cover.
- Remove the bolts -1- and then
remove the hood catch -2- from the
lock carrier -3-.
- Tighten the bolts to 5 Nm.
Installing
Install in reverse order of removal.
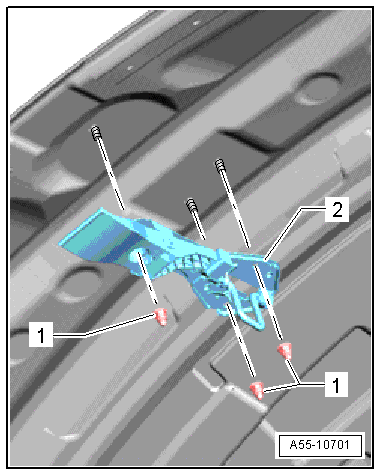
Catch, Removing and Installing
1 - Nut
- Tightening specification. Refer to
→ Chapter "Overview - Hood".
2 - Catch
- Removing
- Remove the bolts and the hood catch.
- Installing
- Align the hood catch with the markings on the hood
-arrows- and then tighten the bolts.
3 - Hood
READ NEXT:
1 - Hood
2 - Hood Hinge
Removing
Before removing a hood hinge, support the hood or secure it against
falling.
Remove the gas-filled strut. Refer to
→ Chapter "Gas-
Overview - Rear Lid, Sedan
1 - Rear Lid
Removing and installing. Refer to
→ Chapter "Rear Lid, Removing and Installing, Sedan".
2 - Stop Strip
3 - Adjusting
Rear Lid, Removing and Installing, Sedan
1 - Rear Lid
A second technician will be needed during removal and installation
to support and to hold the rear lid.
Removing:
Note
Ma
SEE MORE:
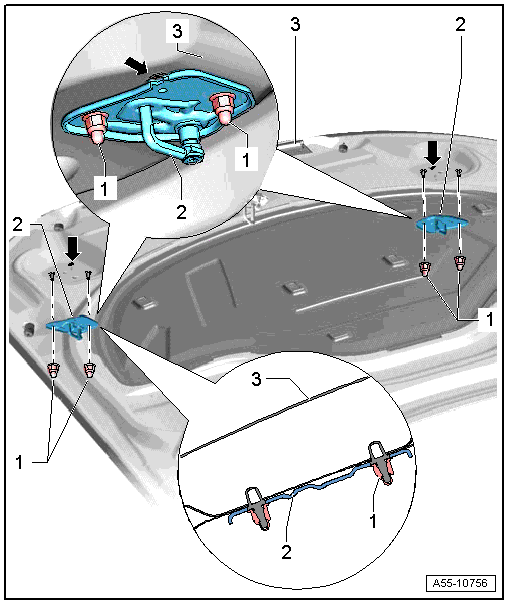
Overview - Luggage Compartment Side Trim Panel, Sedan
1 - Tie-Down Eye
Quantity: 2
Removing and installing. Refer to
→ Chapter "Tie Down, Removing and Installing".
2 - Bolt
6 Nm
Quantity: 4
3 - Clip
Quantity: 2
Insert in the trim panel
Remove any r
Overview - Luggage Compartment Floor, Sedan
Note
The luggage compartment floor covering for vehicles with fold-down
rear seat back is shown.
1 - Support
Quantity: 2
2 - Vehicle Jack/Break-Down Kit
Equipment levels
3 - Frame
For rear panel sill
Removi

