Audi A6 Typ 4G: Testing Equipment, Tools and Materials
General Information
 Note
Note
This list outlines the testers, tools and materials required
for expert refrigerant circuit repair work.
- For tools and materials available from the distribution
center or importer. Refer to
→ Chapter "Tools and Materials Available from Distribution
Center or Importer".
- For commercially available tools and materials. Refer to
→ Chapter "Commercially Available Tools and Materials".
- For improvised tools. Refer to
→ Chapter "Improvised Tools".
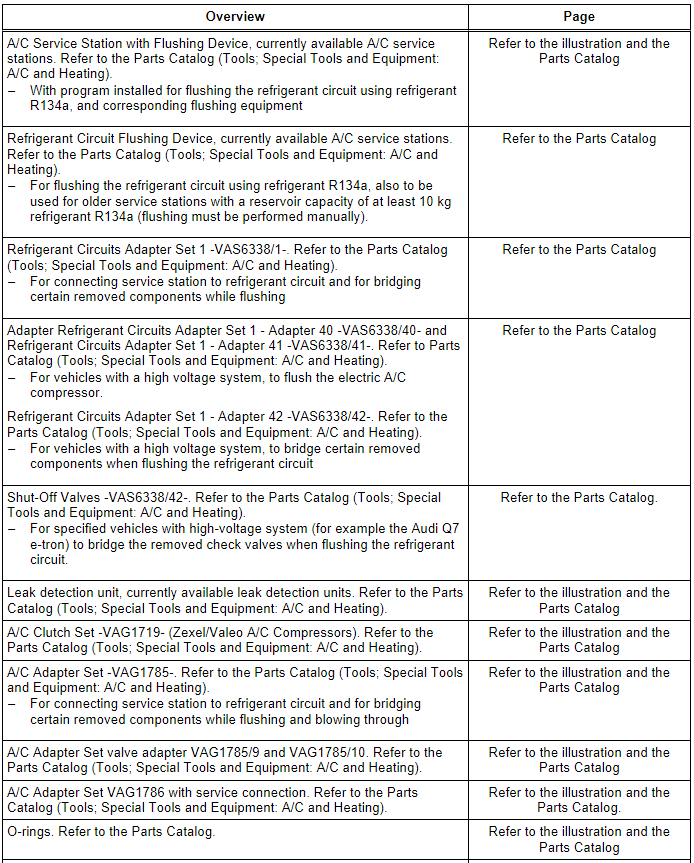
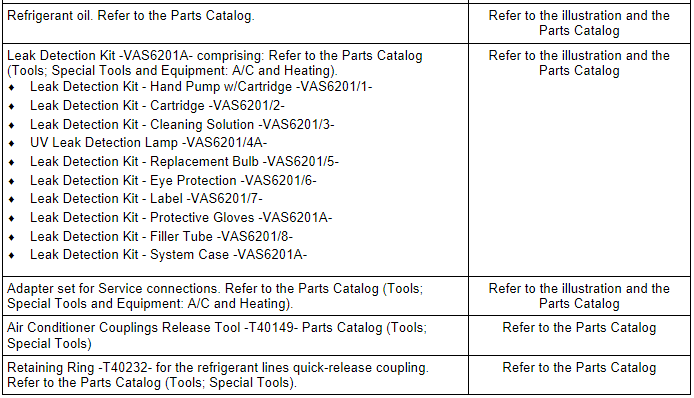
Tools and Materials Available from Distribution Center or Importer
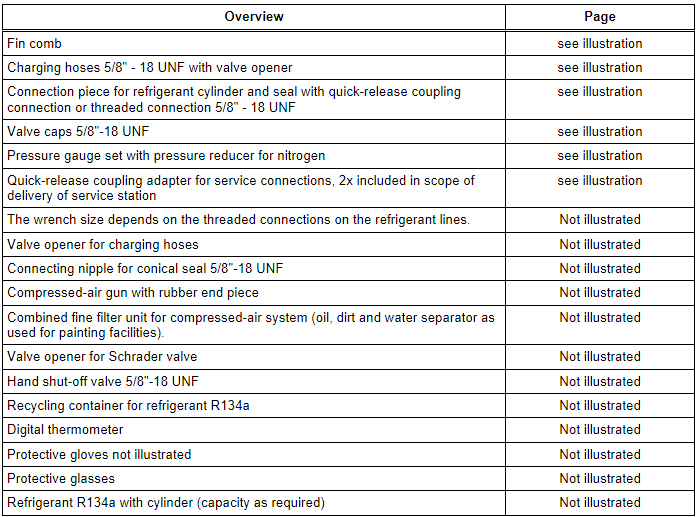
Commercially Available Tools and Materials
Improvised Tools

READ NEXT:
Service station/A/C Service Station (this illustration shows
), currently available A/C service stations. Refer to the Parts
Catalog (Tools; Special Tools and Equipment: A/C and Heating).
Work pro
Fin comb
Fill hoses
5/8"-18 UNF thread
Note
Use differently colored charging hoses (1800 mm long).
Have valve opener and spare seals to hand.
A charging hose in short version is also incl
Fluid Capacity Tables
Maintenance, diagnosis
Audi A6/S6
Caution
All quantities are approximate. Always refer to the
Repair Manual and/or the Maintenance Procedures for
correct filling instr
SEE MORE:
Overview - Rear Lid, Sedan
1 - Rear Lid
Removing and installing. Refer to
→ Chapter "Rear Lid, Removing and Installing, Sedan".
2 - Stop Strip
3 - Adjusting Buffer
Adjusting
4 - Rear Lid Latch
Removing and installing. Refer to
→ Chapt
Subwoofer -R211-, Removing and Installing, Standard
The Subwoofer -R211--2- is
located in the center of the rear shelf.
Removing
- Turn off the ignition and all electrical consumers and
remove the ignition key.
- Remove the rear shelf. Refer to
→ Body Interior; Rep. Gr.70;&n

