Audi A6 Typ 4G: Wind Deflector, Removing and Installing
Wind Deflector, Removing and Installing, Sedan
Removing
- Open the sunroof all the way.
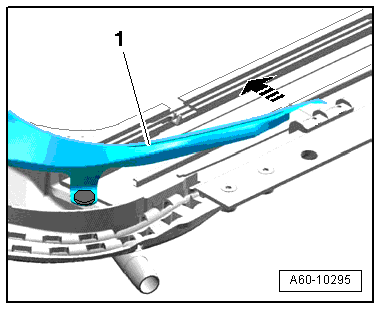
- Push the front wind deflector down and remove the wind deflector arms from the bracket toward the center of the vehicle.
- Remove the wind deflector -1- toward the rear and out of the sunroof opening.
- Install in reverse sequence.
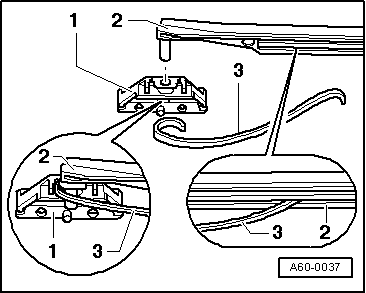
Wind Deflector Spring
- Install the spring -3- into the wind deflector mount -1-.
- Install the spring into the outer groove in the wind deflector -2-.
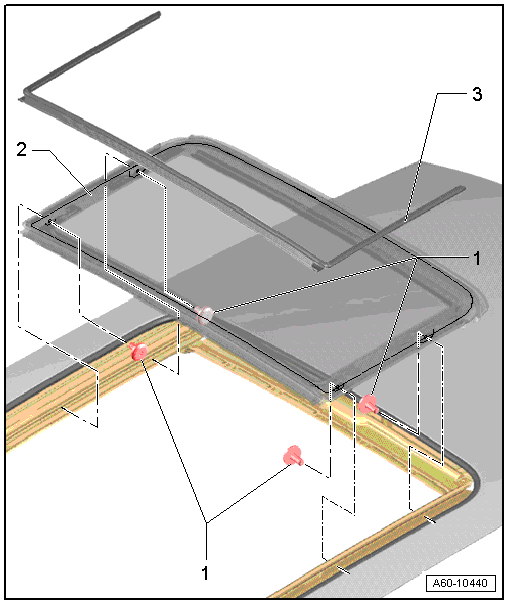
Wind Deflector, Removing and Installing, Avant
1 - Panorama Sunroof Frame
2 - Wind Deflector
- To remove, open and close the sunroof panel "1".
- Disengage the wind deflector net from the frame beginning at the front.
3 - Wind Deflector Spring
Glass Panel, Removing and Installing
Sunroof Panel "1" for Panorama Sunroof, Removing and Installing
 Caution
Do not move or operate the already removed sunroof panel otherwise it may become damaged.
 Note
Note
Replace the bolts for the sunroof panel mounting if they were completely removed.

1 - Bolt
- Front and rear, quantity: 2 on each side.
- 7 Nm
2 - Front Mount for Slotted Guide Rail
- No replacement part
- Slotted guide rail, adjusting. Refer to → Chapter "Avant Neutral Position".
3 - Sunroof Panel "1"
- Open the sunroof panel and remove the trim toward the rear.
- Remove the rear bolts and then move the sunroof panel slightly to the rear.
- Remove the front bolts and remove the sunroof panel upward.
- Install in reverse order of removal.
- Adjusting the sunroof panel.
4 - Rear Mount for Slotted Guide Rail Guide
- No replacement part
- Slotted guide rail, adjusting. Refer to → Chapter "Avant Neutral Position".
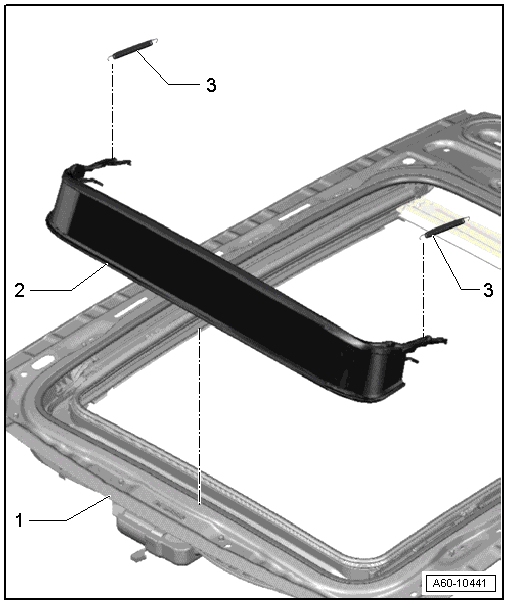
Sunroof Panel "2" for Panorama Sunroof, Removing and Installing
Note
If the screws for the panel mounting were completely removed, then they must be replaced.
1 - Bolt
- 3 Nm
2 - Sunroof Panel "2"
- Open the sun shade completely and remove the side noise seal.
- Remove both front and rear screws and remove the sunroof panel.
- Install in reverse order of removal.
3 - Panel Seal
- Sunroof panel "2" removed.
- Pull the seal off the sunroof panel starting on the left and right sides.
- Pull the front seal upward off the sunroof panel.
- Align the sunroof panel at the front and center and push it into the guides.
- Insert the ends of the seal onto the molding pins.
Sunroof Panel, Adjusting
Sunroof Panel, Adjusting
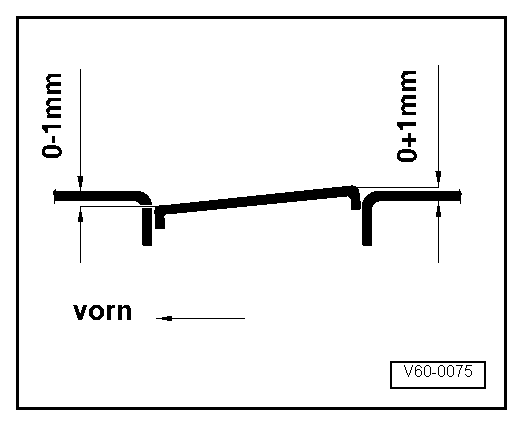
Adjusting
- Perform height adjustment at front and rear according to illustration to prevent wind noise.
- Check height adjustment at each point, left and right, where rounded portion of roof opening merges with straight portion.
- Sunroof panel should not be higher than roof at any point at front or lower than roof at any point at rear.
- When adjusting sunroof panel height, start by running sunroof from open position (not tilted open) into closed position.
Panorama Roof, Adjusting
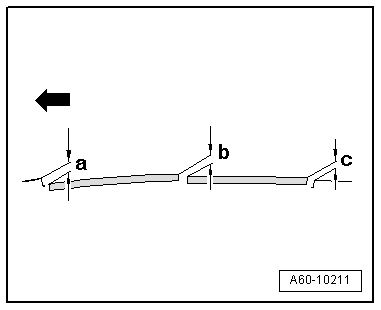
Adjusting
- -arrow- = direction of travel forward
- Dimension -a- = 1.5 mm
- Dimension -b- = 1.0 mm
- Dimension -c- = 0.5 mm
- All dimensions +- 0.5 mm