Audi A6 Typ 4G: Hood, Adjusting
Special tools and workshop equipment
required
- Gauge - Gap Adjustment -3371-
Gap Dimensions for Hood
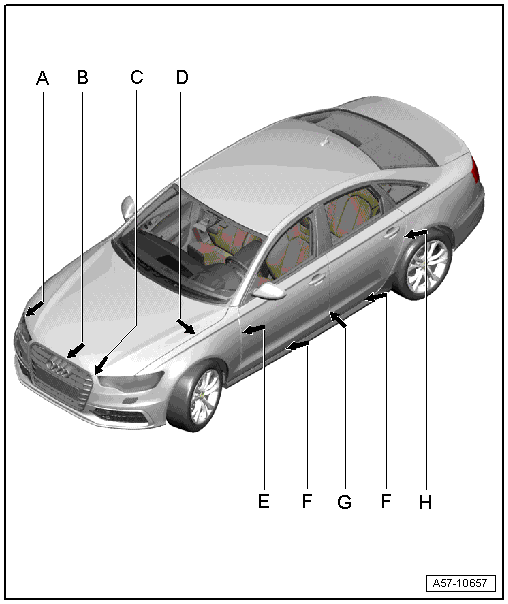
 Note
Note
All dimensions are in mm with a +- 0.5 mm tolerance.
- Dimension -A- = 4.5 mm
- Dimension -B- = 4.5 mm
- Dimension -C- = 4.5 mm
- Dimension -D- = 3.0 mm
Height Adjustment Stop Buffer
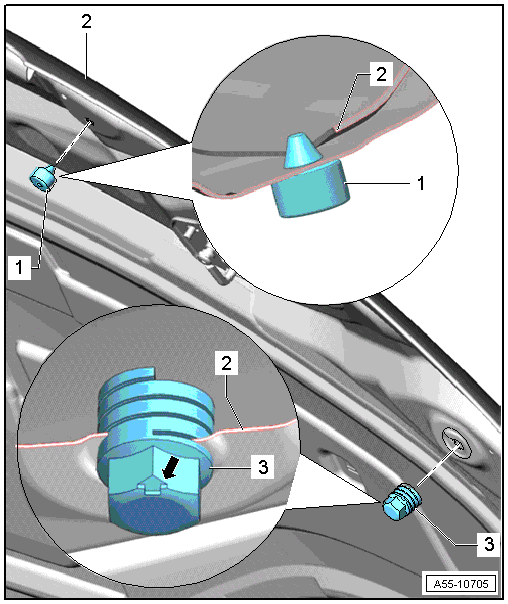
1 - Stop Buffer
- The stop buffer -1- also works as a
strike guard.
2 - Hood
3 - Adjusting Buffer
Note
The adjusting buffers -2- are used to
adjust the height of the hood.
- The adjusting buffer -2- must lightly
contact the lock carrier when the hood is closed.
READ NEXT:
Removing
- Disconnect the connector -4-
from the anti-theft alarm system.
- Disconnect the connector from the lock carrier.
- Free up the release cable -1-
by removing the clamps.
-&n
Hood Hook, Removing and Installing
Removing
- Remove the nuts -1- and the
hood catch -2-.
Installing
Install in reverse order of removal.
Lock Carrier Hook, Removing and Installing
Removing
-&n
1 - Hood
2 - Hood Hinge
Removing
Before removing a hood hinge, support the hood or secure it against
falling.
Remove the gas-filled strut. Refer to
→ Chapter "Gas-
SEE MORE:
Overview - Water Drain Hoses, Sedan
1 - Front Water Drain Hose
The front water drain hoses are routed along the
" A-pillars" and end at the bottom of the
" A-pillar" behind the door.
Clean the Panorama sunroof immediately.
2 - Sunroof Frame
3 - Rear Water Drain Ho
Overview - Valve Block/Module Carrier/Lumbar Support/Fan, Multi-contour
Seat through 08/2012
1 - Driver Seat Backrest Blower Fan -V388-
Front passenger side: Front Passenger Seat Backrest Blower Fan
-V389-
Removing and installing. Refer to
→ Chapter "Front Backrest Fan, Remo

