
Audi A6 Typ 4G: License Plate Lamp
Overview - License Plate Lamp
Overview - License Plate Lamp, Sedan
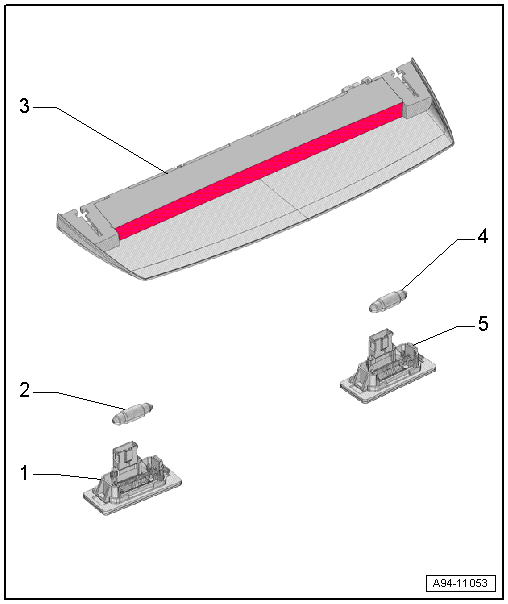
1 - Left License Plate Lamp
- There are different versions. Refer to the Parts Catalog.
- Removing and installing. Refer to → Chapter "Left/Right License Plate Lamp -X4-/-X5-, Removing and Installing".
2 - Left License Plate Lamp -X4-
- Depending on the date of manufacture
- 12 V, 5 W
- Bulb, replacing. Refer to → Chapter "Left/Right License Plate Lamp -X4-/-X5-, Removing and Installing".
3 - High-Mounted Brake Lamp
- With High-Mounted Brake Lamp Bulb -M25-
4 - Right License Plate Lamp -X5-
- Depending on the date of manufacture
- 12 V, 5 W
- Bulb, replacing. Refer to → Chapter "Left/Right License Plate Lamp -X4-/-X5-, Removing and Installing".
5 - Right License Plate Lamp
- There are different versions. Refer to the Parts Catalog.
- Removing and installing. Refer to → Chapter "Left/Right License Plate Lamp -X4-/-X5-, Removing and Installing".
Overview - License Plate Lamp, Avant
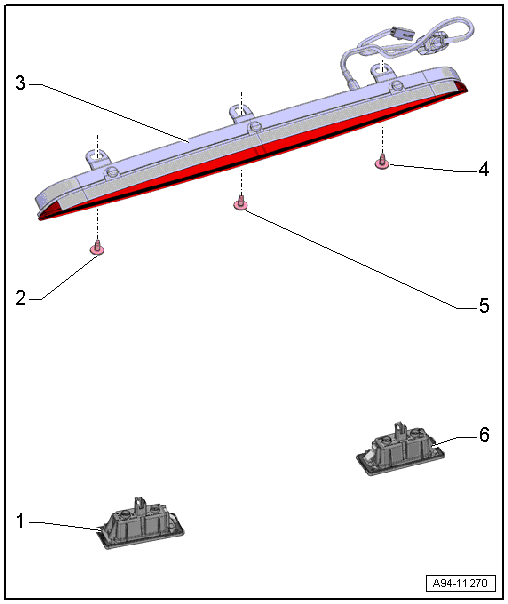
1 - Left License Plate Lamp -X4-
- Removing and installing. Refer to → Chapter "Left/Right License Plate Lamp -X4-/-X5-, Removing and Installing".
2 - Screw
3 - High-Mounted Brake Lamp
- With High-Mounted Brake Lamp Bulb -M25-
4 - Screw
5 - Screw
6 - Right License Plate Lamp -X5-
- Removing and installing. Refer to → Chapter "Left/Right License Plate Lamp -X4-/-X5-, Removing and Installing".
Left/Right License Plate Lamp -X4-/-X5-, Removing and Installing
Removing
- Turn the light switch to position "0".
- Position a screwdriver -1- at the slit and slide it in direction of -arrow- and remove the license plate lamp -2- from the rear lid.
- Vehicles without LED-bulbs: Remove the bulb -3- out of the clamping socket.
Installing
Install in reverse order of removal. Note the following:
 Note
Note
If LED's are malfunctioning, the license plate lamp must be completely replaced.


