Audi A6 Typ 4G (2011–2018) Workshop Manual / Body / Body Exterior / Exterior Equipment / Noise Insulation
Audi A6 Typ 4G: Noise Insulation
Overview - Noise Insulation
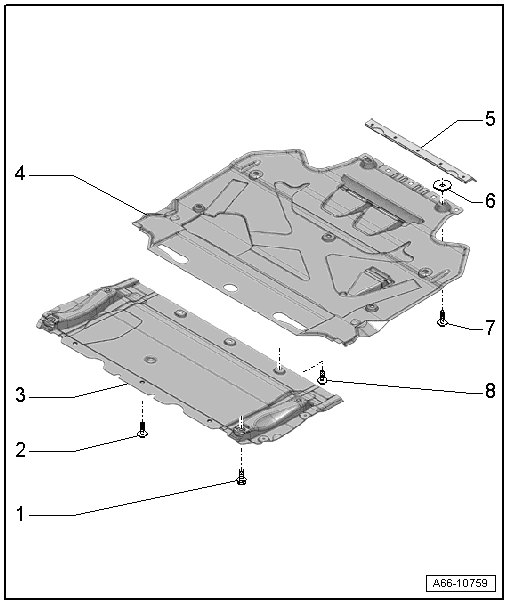
1 - M8 Bolt
- Quantity: 4
- 20 Nm
2 - Quick Release
- Quantity: 3
3 - Front Noise Insulation
- for the engine
- There are different versions. Refer to the Parts Catalog.
- Removing and installing. Refer to → Chapter "Front Noise Insulation, Removing and Installing".
4 - Rear Noise Insulation
- For the transmission
- There are different versions. Refer to the Parts Catalog.
- Removing and installing. Refer to → Chapter "Rear Noise Insulation, Removing and Installing".
5 - Air Guide
6 - Rubber Washer
- Quantity: 7
7 - Quick Release
- Quantity: 7
8 - M6 bolt
- 3.5 Nm
- Quantity: 3
Noise Insulation, Removing and Installing
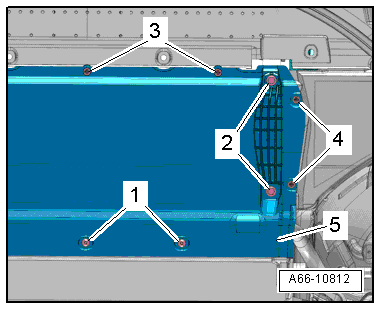
Front Noise Insulation, Removing and Installing
Removing
- Remove the bolts -1 and 2- and open the quick-release fasteners -3 and 4-.
- Remove the front noise insulation -5- to the rear.
- The guide tabs for the front noise insulation will disengage while doing this.
- Remove the front noise insulation.
Installing
Install in reverse order of removal.
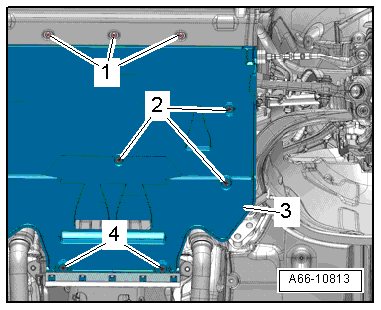
Rear Noise Insulation, Removing and Installing
Removing
- Remove the bolts -1-.
- Loosen the quick-release fasteners -2 and 4-.
- Remove the rear noise insulation -3-.
Installing
Install in reverse order of removal.