Audi A6 Typ 4G (2011–2018) Workshop Manual / Body / Body Exterior / Exterior Equipment / Overview - Spoiler
Audi A6 Typ 4G: Overview - Spoiler
Overview - Rear Lid Spoiler
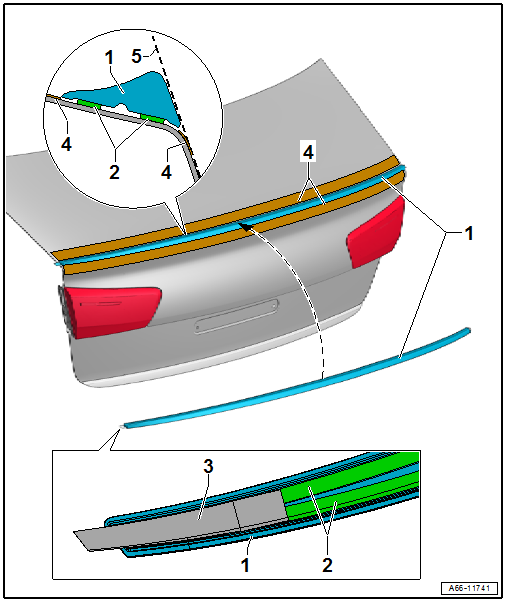
1 - Spoiler
- Removing and Installing. Refer to → Chapter "Rear Lid Spoiler, Removing and Installing".
2 - Two-Sided Adhesive Tape
- Remove the protective film after positioning the spoiler on the rear lid.
3 - Removing Aid
- After the spoiler is positioned exactly on the rear lid, remove the protective film at the removing aids between the rear lid and the spoiler.
4 - Adhesive Tape
- To prevent damage during removal, tape the rear lid in front of and behind the spoiler.
5 - Aid Line
- To position the spoiler toward the rear on the rear lid.
- When installing, align the spoiler on the side and position as shown toward the rear to the aid line (imaginary line) on the rear lid.
Overview - Spoiler on Roof Edge
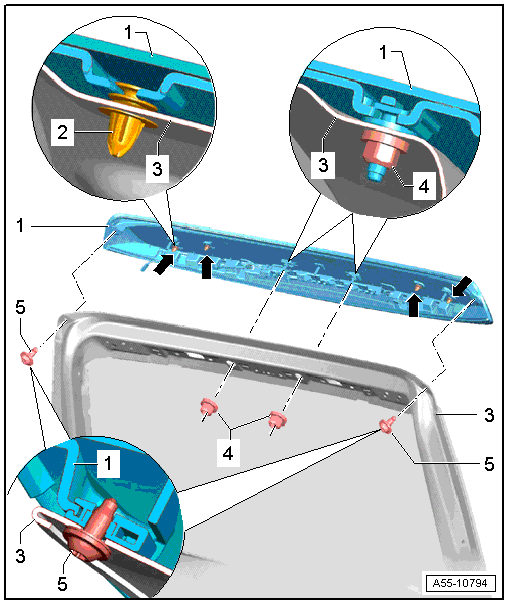
1 - Spoiler on Roof Edge
- Removing and Installing. Refer to → Chapter "Roof Edge Spoiler, Removing and Installing".
2 - Clip
3 - Rear Lid
4 - Nut
- 4 Nm
5 - Screw
- 2.5 Nm

