Audi A6 Typ 4G: Hood, Removing and Installing
Hood Impact Guard, Replacing
 Note
Note
The impact guard is also equipped with double-sided adhesive tape.
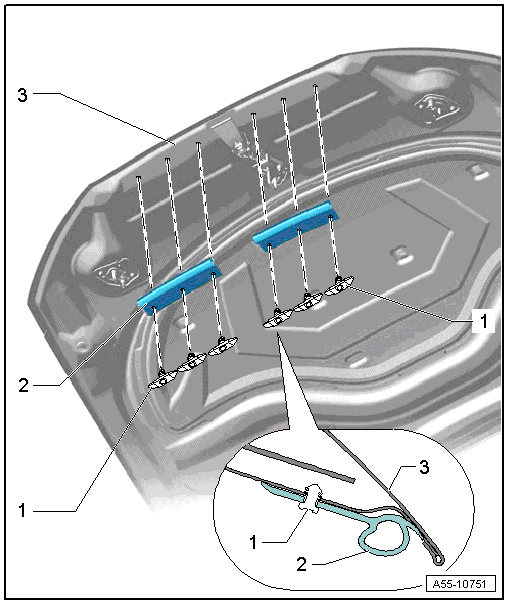
1 - Clip
2 - Impact Guard
- To remove, remove the clip from the hood and then remove the impact
guard.
3 - Door
Hood Seal, Removing and Installing
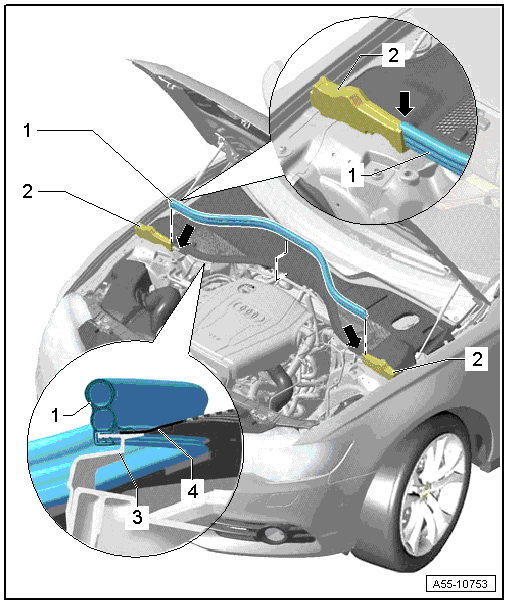
1 - Gasket for Plenum Chamber
- To remove, pull forward off the body flange.
- Mount the seal on the foam piece and then push it onto the flange on
the body.
- Mount the seal on the opposite side on the foam piece and push it
onto the flange on the body.
- Press the seal on the opposite side on the flange on the body using
up any overlap.
2 - Right Sealing Profile
- To remove, unclip it from the fender flange and the suspension strut
tower.
- Press the clips on the foam piece into the body when installing.
3 - Plenum Chamber Bulkhead
- Slide the plenum chamber seal on at the sides.
READ NEXT:
Special tools and workshop equipment
required
Gauge - Gap Adjustment -3371-
Gap Dimensions for Hood
Note
All dimensions are in mm with a +- 0.5 mm tolerance.
Dimension -A- = 4.5 mm
Di
Removing
- Disconnect the connector -4-
from the anti-theft alarm system.
- Disconnect the connector from the lock carrier.
- Free up the release cable -1-
by removing the clamps.
-&n
Hood Hook, Removing and Installing
Removing
- Remove the nuts -1- and the
hood catch -2-.
Installing
Install in reverse order of removal.
Lock Carrier Hook, Removing and Installing
Removing
-&n
SEE MORE:
Pedals
The pedals must always be free to move and
must never be interfered with by a floor mat or
any other object.
Make sure that all pedals move freely without interference
and that nothing prevents them from
returning to their original positions.
Only use floor mats that leave the pedal area fre
Fig. 83 Instrument cluster: selector lever positions
The selector lever position that is engaged is
shown in the instrument cluster display.
P - Park
This selector lever position prevents the vehicle
from rolling. You can only shift into Park when
the vehicle is stationary.
To shift in and out of t

